The Choices
- Flow phenomenon: Water boiling? Faucet dripping?
- Visualization technique: Add dye? See light distorted by air/water surface?
- Lighting: Continuous? Strobe? Sheet?
- Visual acquisition: Still? Video? Stereo? Time lapse? High speed?
- Post processing: Creating the final output. Editing: at least cropping the image and setting contrast.
So here we are at Choice 4: Photography. We’ll use the term to refer to both video and still image acquisition since the considerations of optics and exposure apply equally to both. Besides, major films have directors of photography, right?
Now we’re ready to actually capture that visualization. So many more choices here! Of course, you can do what everybody on the planet does with a camera these days. Just point and shoot, and trust the camera to make all those choices for you. This often works; modern cameras and their choice algorithms usually do a great job. If you don’t like it, well, maybe you can fix it in post (processing). But let me warn you: flow vis is different. Cameras are optimized to take pictures of humans and maybe landscapes. They will fail in flow vis; they’ll focus on the wrong area, they’ll set the exposure (overall brightness) for the wrong thing. You, as the photographer, need to know when and how to force your camera to yield to your choices.
There are tons of resources for learning these technical aspects of photography. Students at CU Boulder have access to many tutorials, written and video, on LinkedIn Learning. Here in this guidebook, we’ll start with the aspects you already have full control over; framing, e.g. composition, and documentation, and then tackle the other aspects. On the next page we’ll go over the current camera technologies that are out there, focusing on consumer level stuff, some ‘prosumer’ items, and maybe a high-end, cutting-edge item or two, and then lenses and optics.
Here’s how this photography section will go:
A: Framing and Composition
B: Cameras
C: Lenses
D: Exposure
E: Resolution
1. Framing and Composition
a. Rules of Thumb for Composition
There are a number of common approaches to composing, i.e. framing a visual. I rate Rule #1 as the most important for flow vis, but all these ‘rules’ are just guidelines; they can be broken successfully (with care) and are interpreted subjectively. Several of them conflict; you can’t apply them all in one image. You’ll find yourself more attracted to one than another. Go with it, and make the image speak for you; make it say what you want it to visually.
#1 Rule of Photography: Fill the Frame.
A common problem of beginning photographers is that they are overly concerned with ‘getting the whole thing’, and as a result the subject takes up a small fraction of the whole frame. When you are making an image with both visual interest and scientific utility, ‘getting the whole thing’ will kill the first in service to the second. Instead, zoom in or move in close to make the best image of the most interesting part of the subject, and then make additional images for documentary or explanatory purposes. Don’t try to accomplish more than one purpose in a single image. A corollary of this rule is thus ‘make your visual about one subject’. If you are making a video, plan on using multiple video clips to serve the various purposes in your final product.
#2 Rule of Thirds
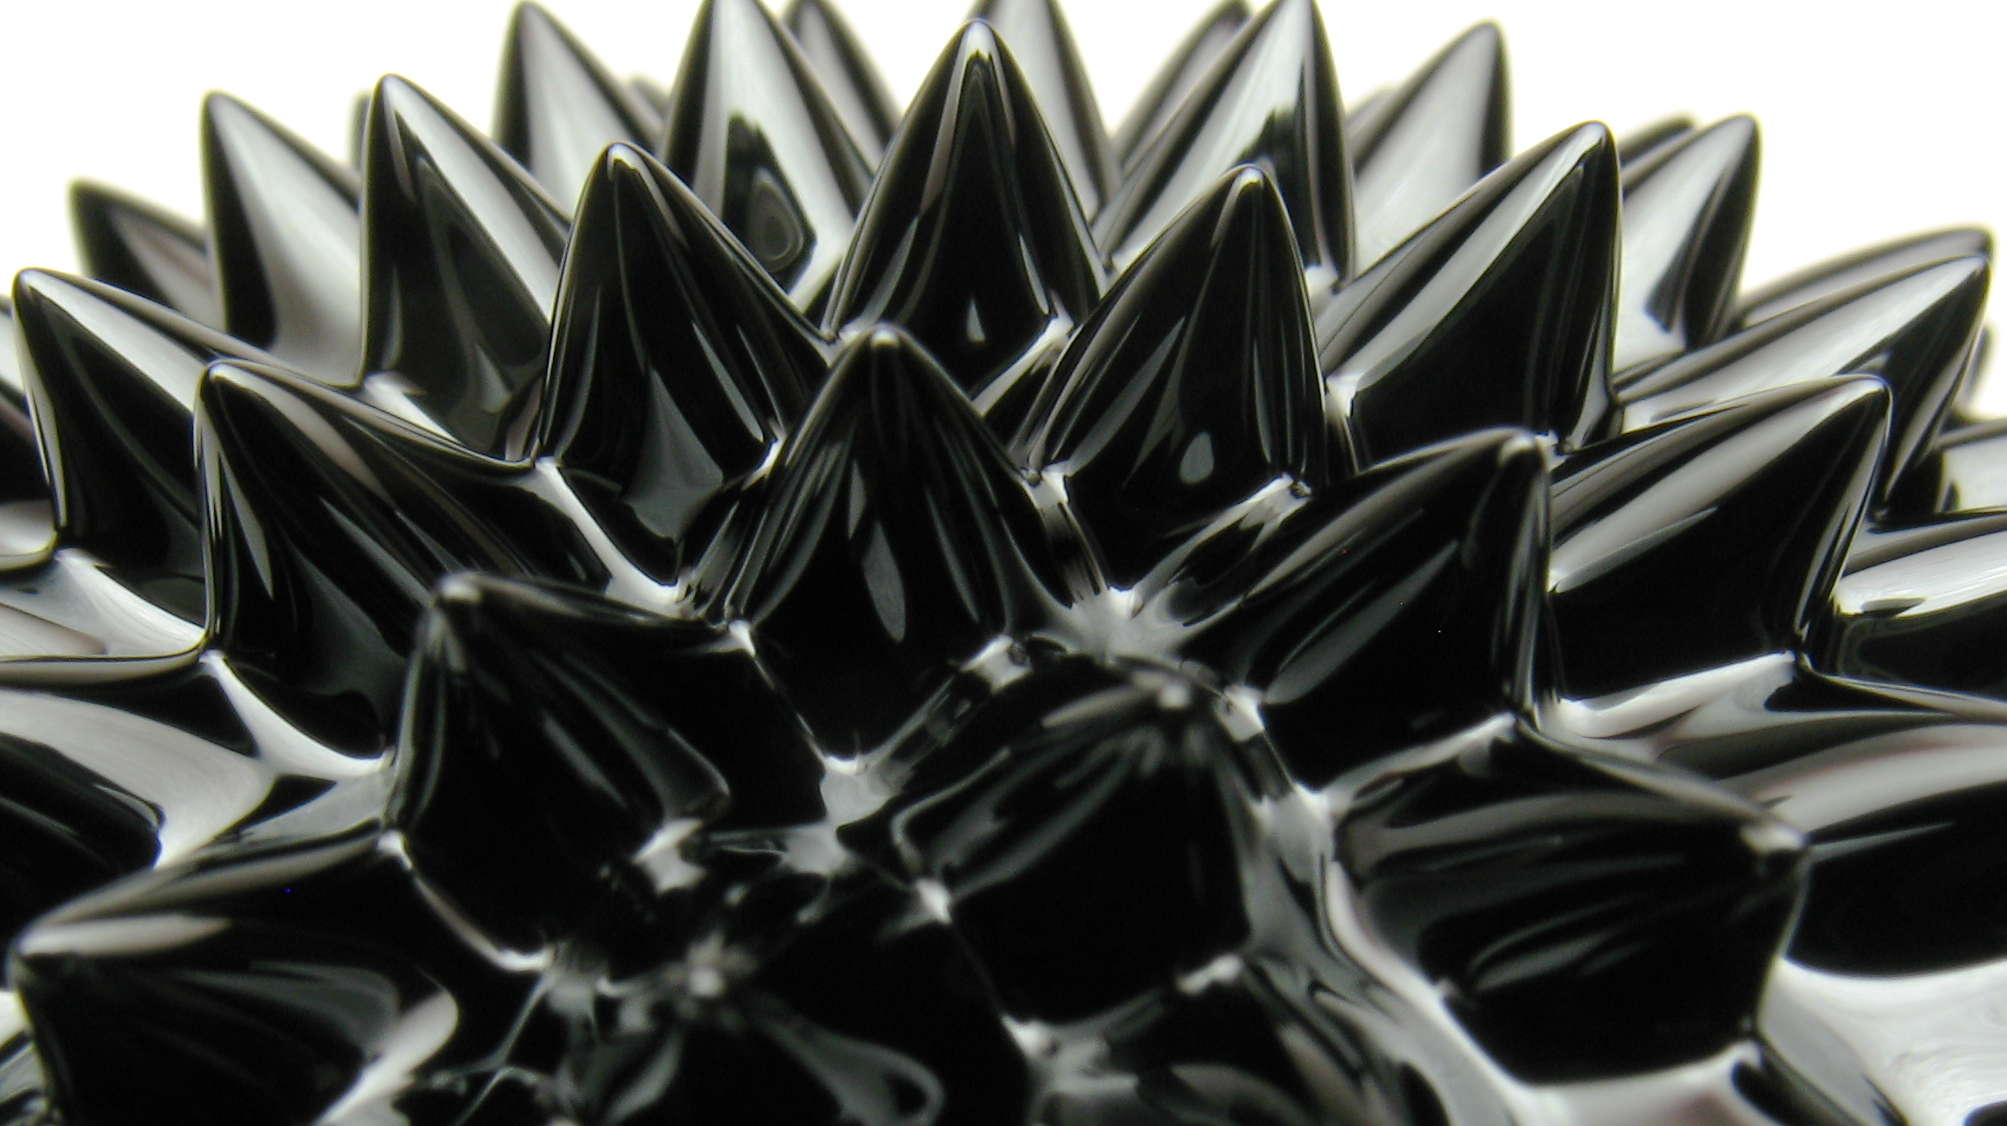
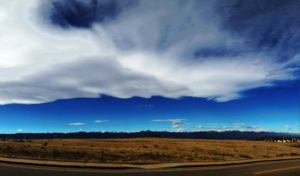
Foremost among compositional rules is the ‘Rule of Thirds’. This means putting the most important element of the image at the intersection of a grid dividing the image into thirds, both vertically and horizontally. This is such a common approach that most cameras have an option for their viewfinders to show this grid, even your cellphone camera (check the app settings). Figure 1 shows a graceful implementation of this rule. There is a lot of ‘negative space’ in this image, space where nothing of interest is going on; the Rule of Thirds makes this space a pleasing setting for the subject. Still, a tighter crop, following Rule #1 as well, could have worked nicely, too.
#3 Symmetry
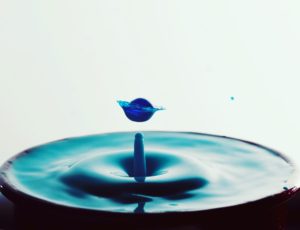
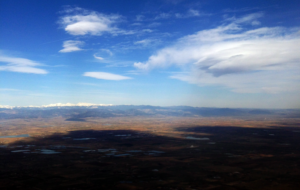
Following Rule #1 often results in the main subject being placed smack dab in the center of the image. This works very well for subjects that are fairly symmetric (Figure 2); most people find symmetry satisfying. However, if the subject itself is not symmetric, you may end up with ‘broken symmetry’ and the Rule of Thirds may serve better than a centered placement. A common example is in landscape photography; you may have heard advice to avoid placing the horizon line in the center of the image. I advise you to follow it unless you have a specific reason not to: consider Figures 3 and 4.

#4 Strong Diagonal
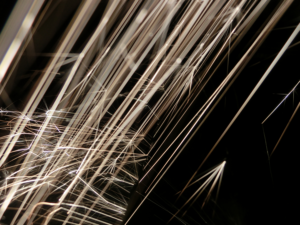
I admit, I love a good strong diagonal. Diagonals work great for subjects with long aspect ratios – much wider than they are tall (Figure 5) or vice versa – and for any subject with a lot of parallel lines (Figure 6).
#5 Repetition
Which brings us to repetition. Repeating a subject element many times is a common compositional strategy in photography. In flow vis, this might mean a collection of shiny points (Figure 1), bubbles, streams, waves, flames or spark trails (Figure 6). This strategy combines well with #3, strong diagonals.
b. Documenting
Documenting an image is simply recording what you’ve done, in enough detail that you, or somebody else, could approximately reproduce the image. Nobody really likes this part, but it is essential to preserving the scientific utility of your image. Good artists, those who are in control of their craft, also need to document for their own development. Here, during the image acquisition stage, is the best time to document. The details of the camera settings (shutter speed, aperture, ISO, zoom) are generally included in the metadata inside the image file itself, so it’s important to keep a copy of the original image file unchanged. Metadata can be accessed in a number of ways, depending on your device .
While you are shooting, stop after each setup to write down details of how you made the image: your ingredients, including manufacturer, how you added them (what height did you drop from, what was the tube diameter etc.), what color temperature your light was, and everything else you can think of. Then, make a photograph of a ruler at the focus location in your flow. This will tell you how big everything in your image is. This information is important for figuring out and discussing the physics of what is going on. Then, before you break down or change the setup, photograph it so you can show how everything is arranged. Many flow visuals are abstract enough that you’ll need such a photo to explain what you did. Measure and record the distances from the camera and lights to the subject and each other. A lab notebook is a good place to keep this information — either hard copy or digital — along with the ID of the photos matching each setup.
Yes, recording this level of detail is painful, but this is what’s needed to create a publishable image with scientific value. This is the standard you should be working for.
c. Work It
Once you get a flow that you are interested in, lights that look good, and have recorded (and documented) a visual you like, don’t stop there! Work it! You’ve spent all this time and effort, don’t let it go to waste.
Chances are that the image that looks so great on the camera’s viewscreen has a problem that you won’t notice until it is projected huge in front of the class. So, right away, before you finish your shooting session, download the visual to a computer with a good screen and blow up the image; go over it bit by bit.
- Is the focus really, really good? If not, put something with a sharp edge in the flow, lock the camera focus on it, take it out and shoot again.
- Is it blurry from motion? Was the camera moving? Use a tripod! Was the flow moving? Use a faster shutter (we’ll go over this later) or a flash to freeze the flow.
- Can you see details in the highlights and shadows? You might need to adjust the exposure and/or ISO (sensitivity). More on this later too.
- Is there something distracting in the surroundings or background? Adjust (or add) a backdrop to keep attention on the flow. Plain bed sheets, blankets or clean paper can work well for this. The wood grain of a table rarely improves a flow vis image. Trust me. Same for any text written on a jar or glass.
Once you have a visual free of these basic technical issues, move the camera and/or lights and shoot more, from different points of view. Zoom in, zoom out, shift perspective. Think about what you are trying to say with the image, and recompose to highlight the best part. Don’t forget to document as you go along. If you are shooting video, capture close-up clips at different times/locations as the flow progresses. Also pull back to get the overall motion, but don’t stop there. Change the camera settings; try different apertures to get a different depth of field.
OK, now you’ve run out of time. Plan to come back tomorrow and continue!! Great visuals are never made in a single session. If you were making still images, shoot video next. If you have nice video, be sure to get a sharp high-resolution still image next. Try slo-mo (slow motion). Many cellphone camera apps have this choice now, or you can borrow a real high-speed camera. Maybe time-lapse is the way to go; cellphones can do this too. Would a 3-D stereoscopic image make sense? Again, vary your POV (point of view) and your shooting mode.
