
Introduction
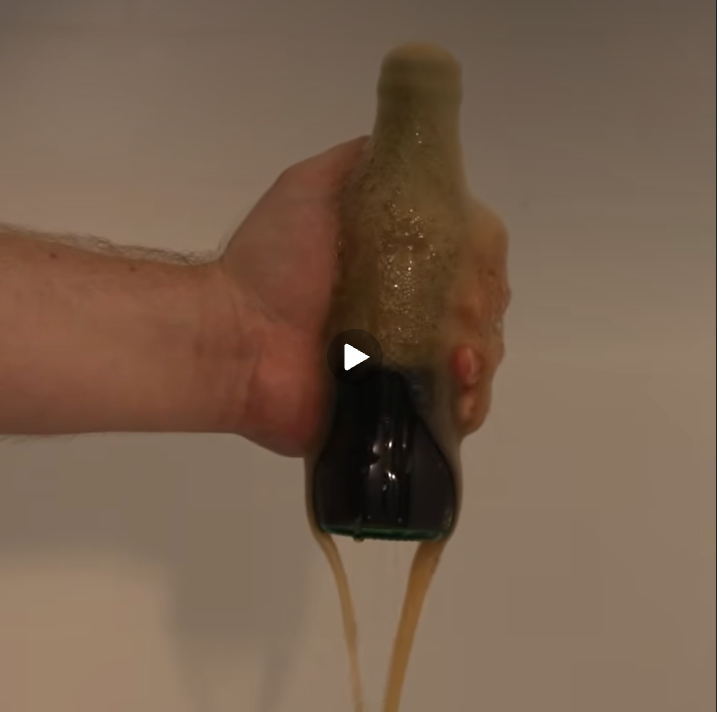
When thinking of what to do for the get wet project I was having a hard time coming up with ideas that felt satisfying, interesting and possible to do. I was going to be working on this by myself and had very limited time to set up anything complex because I needed to split my time between working on this project and family obligations. I eventually landed on a very simple trick that I nonetheless find interesting. When you strike a carbonated bottle from the top it will cause a geyser to explode out the top of it. I found the science behind this very fascinating and thought it would make for a good image or slow motion video.
Why the geyser occurs
I knew that when you strike a bottle from the top it will cause a geyser effect but I never thought about why that was. When you shake a bottle or can that is carbonated it will react violently. In this particular case it’s very interesting. When you hit a bottle of carbonated liquid like soda or beer the glass propagates the shockwaves throughout the entirety of its surface and into the liquid. Glass actually isn’t a complete solid. It is technically an amorphous solid which acts like a solid most of the time but also has properties of a liquid. For instance class flows very slowly. If you take a very old pane of glass from the building it will be noticeably thicker at the bottom then at the top. While interesting in our case it is only important to understand how uniquely glass will transmit the shock waves from the strike into the liquid.
These waves agitate the liquid causing it to go through a process called cavitation in which stable bubbles within the liquid are broken apart into many smaller bubbles which then quickly increase in size as they pull carbon dioxide from the liquid. As they increase in size they gain more buoyancy and rise swiftly towards the surface of the bottle. As they go they increase in size and buoyancy. Pulling more and more dissolved CO2 from the liquid.
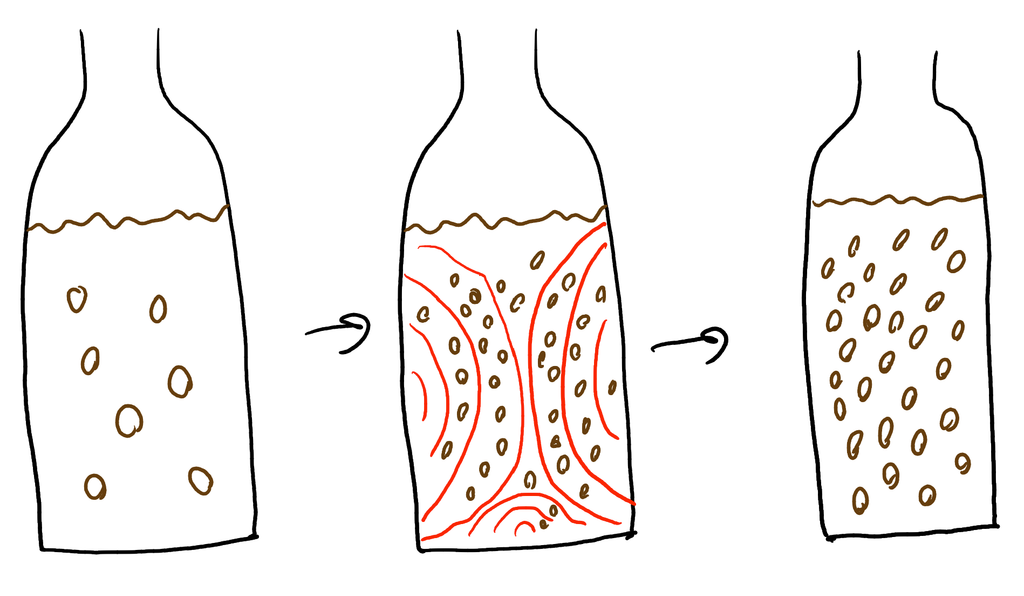
The gas pushes up through the liquid to escape out the top of the bottle. You can see in the video that bubbles form at the bottom of the liquid and flow upward to the top of the bottle. However bottles are not shaped like a uniform cylinder. The top of the bottle narrows giving the moving gas and liquid less area to move through. Thus in accordance with Bernoulli’s principle the speed of the fluid’s movement increases causing it to geyser out the top of the bottle so dramatically. It is possible to increase this explosive effect by decreasing the size of the exit even further. By placing your thumb in the way of the bottles opening it is possible to create an even higher geyser.
Visualization
In order to visualize this process I decided it would be best to use a dark soda and a white background. That way the geyser can be clearly seen. The dark soda also causes the lighter bubbles to contrast more clearly against it. Letting the entire process be easier to see in the bottle. I scraped off the branding on the bottle using a pocket knife so that the brand couldn’t be known but also so that the entire path of the bubbles could be seen. While lighting the space I just used the overhead light in my bathroom. If I were to do this again I would like to do something different. The overhead light in the bathroom is fine but not very interesting. It allows me to adjust the warmth somewhat but it is relatively a minor change. The reason it is what I used has more to do with limitations than anything else. It had to be done in the tub in the bathroom because I didn’t want to make a sticky mess all over the floor. The space in that room is limited. Even navigating around the tripod was difficult. Given more time and some of the advice given by my classmates I believe I could do better lighting if I were to try and recreate this shot.
Camera and Photography
The camera I am using is a Canon EOS 80D. My father lent me this camera for the semester because he is a professionally trained photographer and I am not. The techniques I used to get the shot above were very simple. I taped off a box on the wall of my bath room using scotch tape and set up the camera on a tripod pointing at it. I adjusted the field of view so that it was just inside the box on the wall. This gave me an area I knew the bottle would be in when I shot. Initially I wanted to take a burst of the bottle as the reaction was taking place. I wanted to get a really good shot of bubbles forming and moving through the liquid. Alas my goals outstripped my current ability and I couldn’t get a good focus on the bottle during the reaction. During the critique I was given some advice that would help solve that problem in the future though so I may try this again. In lou of that I decided to take a video using the camera and slow it down into slow motion. I changed the video format on the camera from .mov to .mp4 because it allowed me to shoot at the highest frame rate. In this case 60fps. This wasn’t as high as I would have liked as it basically means I can only play it at half speed before it starts getting choppy. I set the camera settings to TV because it gave the best look to it all. Most of the other settings were too dark. Finally once I had the shot I pulled it onto my computer, cut it down and slowed it down so that it only showed the reaction and did it in slow motion.
Conclusion
I am happy with the results considering the limitations I was working with. The video shows the bubbles forming, moving through the fluid, and exploding out the top in a geyser of foam. It shows the fluid dynamics and physics of the process decently well but it could have been done better. What this process revealed most to me was that I am not much of a photographer at the moment. I do not understand most of the art and craft. I am not a fan of the lighting in my video, how quickly it goes, or how far from the bottle the camera is. I was given a lot of good guidance regarding how better to light the scene and how to adjust the aperture of my camera and the focal length to make the bursts better. In the future I would like to borrow the high speed camera from the ITLL and capture better bursts of the process. I would also really like to get in super close on the liquid to see if it is possible to see the bubbles propagating in the liquid.
References
Pappas, Stephanie. “Explosive Beer Trick Explained by Phisics.” NBC News, Nov. 26, 2013, https://www.nbcnews.com/id/wbna53669545
Doucleff, Michaeleen. “Beer-Tapping Physics: Why A Hit To A Bottle Makes A Foam Volcano.” NPR, 26 Nov. 2013, https://www.npr.org/sections/thesalt/2013/11/20/246390302/beer-tapping-physics-why-a-hit-to-a-bottle-makes-a-foam-volcano.


1 Comment. Leave new
I’ve never seen this effect before, very cool! I enjoyed how you chose a slow motion video to view this effect, it adds to the development of the flow and understanding of what is happening. Whenever I open a bottle again in the future, I will be thinking of this!