
Introduction
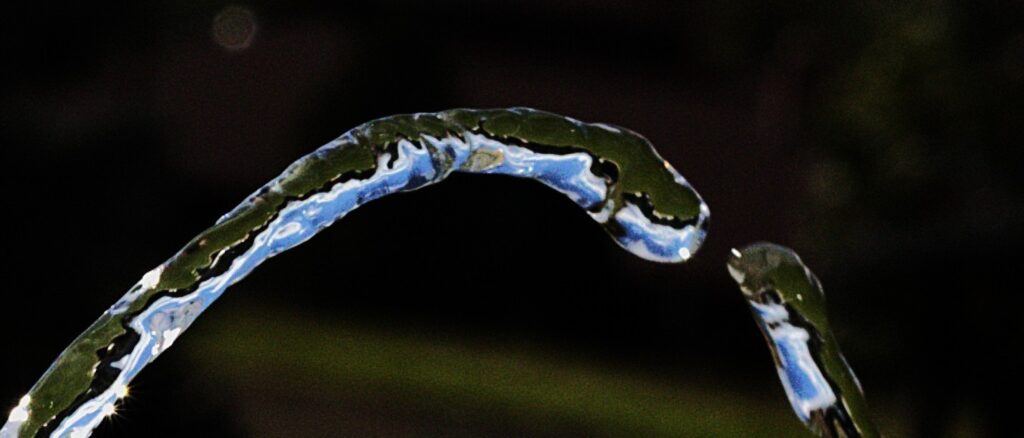
Our group wanted to photograph a laminar flow phenomenon. The easiest way we could think of to create an interesting laminar flow was to fill a balloon with water and poke a hole in it. We went through four balloons and took over 50 photos in different locations to try and find which set up gave the most interesting image. In the end I chose one of the earlier photos that was taken in direct sunlight because of how the mountains and the sky reflected and inverted through the stream.
Set up
The set up for our flow experiment was very simple. It involved a balloon filled with water till it was a little larger than a softball. If the balloon was filled up too little the pressure of the escaping water would be too little to produce interesting results. If we filled it up too much then the balloon would be more prone to just completely pop rather than retain its shape as it deflates. Next we used duck tape to tape a small triangle around the area we intended to poke the hole to ensure the balloon retains its shape and doesn’t pop. The tape adds strength to the surface of the balloon and allows the balloon to deflate slowly. The balloon was placed into a bowl to keep the balloon stationary while it was deflating.
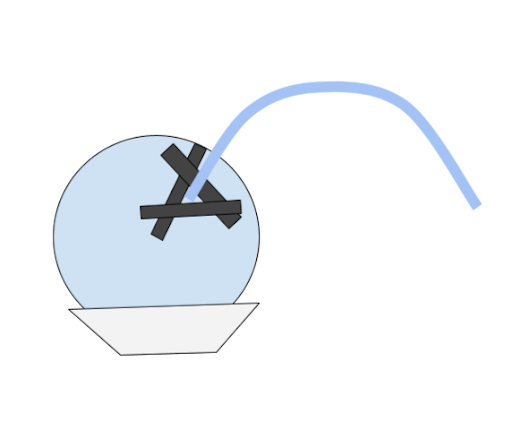
Once the balloon is punctured it will create a laminar stream of water. The distance of the laminar flow before it turned turbulent depends on a lot of factors but the most controllable ones for us were the size of the hole and the pressure pushing the flow. The point at which a flow transitions from laminar to turbulent is dictated by the Reynolds number of the flow

We cannot change the density or dynamic viscosity of the water. However the velocity of the water is indicated by size of the opening and the pressure applied by the balloon or other sources. The diameter can be dictated by the size of the hole we cut. Because of this we found that when we cut a larger hole on a large balloon it became turbulent much faster than then a slightly smaller balloon with a small hole cut in it. It is also important to note that the angle of exit played a significant role in how quickly a flow became turbulent. Flows that were more vertical tended to become turbulent quicker then flows that weren’t.
Visualization techniques
Initially we had planned to use a laser to shine through the flow. A laser should actually follow the flow as it reflects through it creating an interesting effect. This idea fell through however. The effects that helped visualize it best came entirely by accident. Our first few shots were taken out on a wall just outside the Idea Forge in full sunlight. This allowed us to have a very fast shutter speed since the entire flow was very well lit with sunlight reflecting off of it. This made the flow look very crisp. The second visualization aid was that we shot some of the flows with the flat irons in the background. This created an effect where the flow reflected and inverted the sky, dark mountains, and green grass so with a small amount of editing a very clear almost water color rendition of the sky, mountains and grass can be seen.
Camera Setting and Post Processing
To capture the images I used a Canon ESO 80D. The lens used was a Canon EF 50mm with 50mm focal length or a 77.7mm 35mm equivalent. I shot with a focus distance of 1m and aperture of f/10, a 1/1000 exposure and an ISO of 200. The raw file was 6014×4010 pixels. In post processing I cropped the image down to reduce the amount of distractions in the background and focused on the highest point of the arc. I then increased the contrast and turned down the shadows and brightness a bit to darken the background and make the colors pop. Finally I increased the sharpness to emphasize the lines between the colors and the edge of the laminar flow. This created an image that clearly shows the top of the stream and the reflections of the sky, mountains, and grass inverted on the flow.
Conclusion
I am actually quite satisfied with how the pictures turned out and the process we used to get there. All of us ended up having more fun taking the pictures then we thought we would. I chose the image I did specifically because it shows a nice laminar flow with a very clear reflection in it. It also has a discontinuation in the flow which would normally be indicative of turbulent flow which was interesting. This was most likely caused by trapped air inside of the balloon causing a small break in the flow. If I were to go in a different direction with it I would like to try our original laser idea in a dark room. The image would be very different but I still think it would be cool. If I could improve anything it would be on the post processing side. I am new to post processing and one comment I got in critiques was that there are some bright spots in the background and a good deal of fuzz in the background. I was told a couple ways to eliminate those things which I would most likely have done if I had known. Regardless I am very happy with the results produced and feel that it fulfilled the initial intent quite well.

