Imaging and Setup
The experiment was filmed on an iPhone 16 Pro Max in 1080p at 120 fps using the built in slow motion mode. My team and I built a compact optical breadboard and a custom cube to hold and align the laser apertures inside our homemade wind tunnel. The phone sat inside the test section looking and was aligned as close to normal as we could get to the laser sheets. We ran seeded glycol vapor through the tunnel. In the rear of the wind tunnel we mounted a 100CFM carbon filter fan and the custom optical cube to align two perpendicular laser sheets into the models at varying angles of attack. The dual planar laser induced phosphorescence, lit up cross sections better than anticipated.
Physical Phenomena
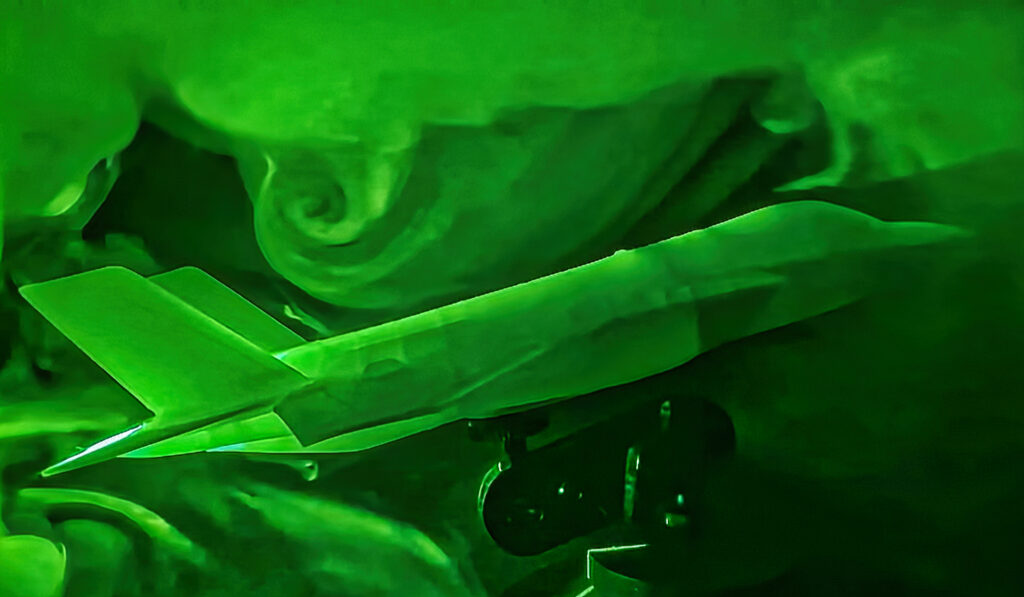
We tested two iconic shapes in the tunnel. The first was a Toyota Supra style sports car body that is visually similar to a classic 2JZ era chassis. At moderate flow speeds it behaves like a streamlined bluff body. The boundary layer grows over the nose and roof, then separates near the rear of the car and rolls up into an unsteady shear layer and a vortex street in the wake. In the illuminated planes this shows up as packets of seeded flow peeling off the front pillars and trailing edge and rolling downstream. The second model was a delta fighter inspired planform (above), that I 3D printed out of a phosphorescing PLA. The model generates strong leading edge vortices that run along the sharp forebody toward the outer wings and help support vortex driven lift. Small changes in effective angle of attack cause these vortices to grow, drift, and occasionally break down. In the laser sheets this appears as tight spiral cores that pulse, spread, and mix into the wake above and behind the wing.
6 Comments. Leave new
Hi Duncan, it was relatively easy to do with foam board, I recommend starting as small as possible to get the most accurate results!
Very creative idea, the laser was a great idea for showing the fog.
Thanks Nicholas , I was so excited to capture these flow structures.
Your setup is very creative, I love the flow structures visible in the planar laser.
Hi Jake, thank you for your kind words! I really enjoyed this flow visualization with my team!
Super cool how you built your own wind tunnel for this, and I like the green light to visualize the fog. Amazing video!