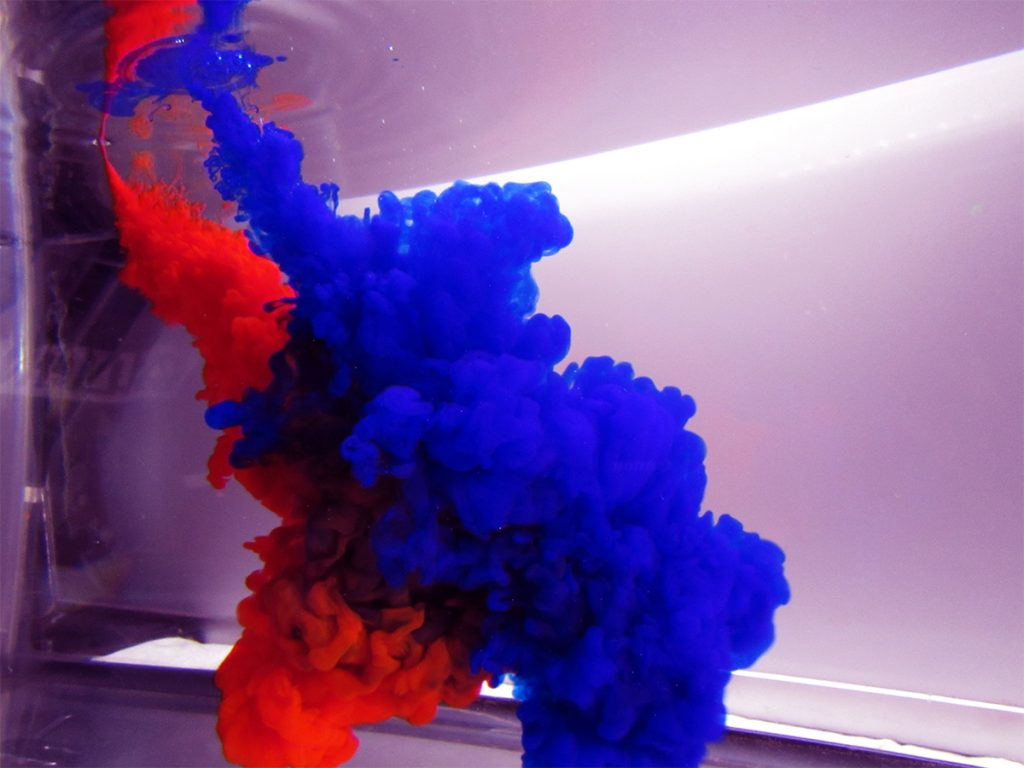
Chad Sloan
Worthington Jet
Chad Sloan, Team First Picture
MCEN 4151-001, 10/10/18
Help From: Will Tse, Chris McFadden, Steven Li
The purpose of this image is to capture the Worthington jet effect that occurs from a single droplet of water in a larger area of still water. When my team (Will, Chris, and Steven and I) was setting up this flow we were initially trying to collect a picture of a water drop colliding with the Worthington Jet but unfortunately, we were unable to set up the camera correctly. The Worthington Jet is the phenomena where after a drop of water still a large still water surface and after the water hits there is a small jet of water that comes back up out of the water.
The apparatus used in order to capture this photo is one that we checked out from Professor Hertzberg. This apparatus is called the drop collision. It includes a stand and a servo motor that produces as many drops at whatever time gap you want. The Worthington Jet, also known as the Rayleigh Jet, is produced from a crater that is created in the water by the large drop. As the crater closes quickly over the object, the water rushes back into place and propels droplets of water back into the air. This happens because the water becomes turbulent. After dropping an 1/8” = .003175 m water droplet from a height of 8” = 6.5 m/s and water having Kinematic Viscosity of v= 1.004×10^-6 m^/s we found that the Reynolds number (equation 1) was equal to 20555.2
Re = UD/v Equation 1
Once the Reynolds number becomes larger than 2000 the flow becomes Turbulent. Because of the size of the drop and the height that it was dropped from created enough speed and force to cause the liquid to become Turbulent and cause a Worthington Jet.
In order to create the teal color, we added blue food coloring to water. We added 3 drops of food coloring to approximately 24 oz of water. For our set up we were able to check out a stand from Prof. Hertzberg, this stand was made out of steel bars and set screws in order to adjust the height of the drop. In order to get the right lighting, we used an overhead light that was in the study room as well as two iPhone flashlights.
To capture the photo above we placed our Nikon camera a foot away from the drop. We chose to capture our photo from closer up because we wanted to get a better focus on the base of the jet. We turned the shutter speed up and the ISO up. We did this so that we could minimize motion blur as well as try to get as sharp of an image as possible. During post processing I adjusted the color curve in order to bring the brightness of the blue out more. I also cropped the image to get rid of the unnecessary things around the flow. The last thing I did was turn the blurriness down as much as possible to get the clearest picture possible.
This image reveals a little more about why there is a splash back when water or other objects hit a standing puddle. I like the idea behind the picture but unfortunately, I was unable to capture exactly what I wanted. The picture isn’t as sharp as I wish it could be. I think the photo show the flow well, you can tell what is happening. A direction I could go to push the idea is to get a water drop to collide with the Worthington Jet.
Recourses:
https://www.flowvis.org/wp-content/uploads/2016/10/Worthington-Crown-Report-Jason-Savath.pdf
Categories
Flow Vis Guidebook
- Introduction to the Guidebook
- Overview 1: Phenomena. Why Does It Look Like That?
- Overview 2: Visualization Techniques
- Overview 3: Lighting
- Overview 4 - Photography A: Composition and Studio Workflow
- Overview 4 - Photography B: Cameras
- Overview 4 - Photography C: Lenses - Focal Length
- Overview 4 - Photography C: Lenses - Aperture and DOF
- Overview 4: Photography D: Exposure
- Overview 4 - Photography E - Resolution
- Overview 5 - Post-Processing
- Clouds 1: Names
- Clouds 2: Why Are There Clouds? Lift Mechanism 1: Instability
- Clouds 3: Skew - T and Instability
- Clouds 4: Clouds in Unstable Atmosphere
- Clouds 5: Lift Mechanism 2 - Orographics
- Clouds 6: Lift Mechanism 3 - Weather Systems
- Boundary Techniques - Introduction
- Dye Techniques 1 - Do Not Disturb
- Dye Techniques 2 - High Visibility
- Dye Techniques 3 - Light Emitting Fluids
- Refractive Index Techniques 1: Liquid Surfaces
- Refractive Index Techniques 2: Shadowgraphy and Schlieren
- Particles 1- Physics: Flow and Light
- Particles 2: Aerosols
- Particles 3: In Water
- Particles 4 -Dilute Particle Techniques
- Art and Science
- TOC and Zotpress test
- Photons, Wavelength and Color